Google Docs has become an essential tool for students, professionals, and anyone who needs to create documents online. One of the most critical aspects of document formatting is setting the right margins. Margins not only define the area where your text will appear but also impact the overall aesthetics and readability of your document. Whether you're preparing a report, writing an essay, or crafting a business proposal, knowing how to change the margins on Google Docs is crucial for achieving the desired look and feel.
Setting the right margins can help you manage space effectively, ensuring that your content is well-aligned and visually appealing. In Google Docs, adjusting the margins is a straightforward process that can be accomplished in just a few steps. Understanding how to modify these settings can enhance your document’s professionalism, making it more presentable to your audience.
In this guide, we will walk you through the simple steps to change the margins on Google Docs and answer some common questions that might arise during the process. Whether you’re a novice or an experienced user, this article will equip you with the knowledge you need to customize your documents effectively.
Why Should You Change the Margins in Google Docs?
Changing the margins in Google Docs can significantly affect the readability and layout of your document. Here are some reasons why you might want to adjust your margins:
- To comply with specific formatting guidelines for assignments or professional documents.
- To create a visually appealing layout that is easy to read.
- To fit more content on a page without compromising readability.
- To leave adequate space for annotations or comments in collaborative documents.
How to Change the Margins on Google Docs?
Changing margins in Google Docs is a simple process that can be done in just a few clicks. Here’s how you can do it:
- Open your document in Google Docs.
- Click on "File" in the top menu.
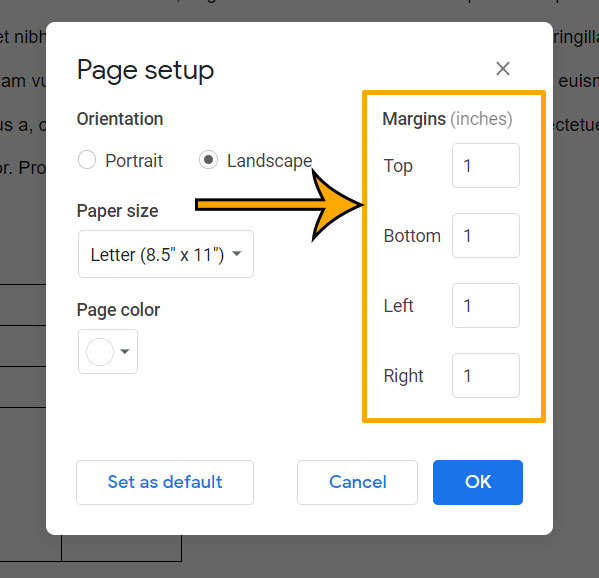
- Select "Page setup" from the dropdown menu.
- A window will appear where you can adjust the margins.
- Enter your desired margin size (in inches) for the top, bottom, left, and right margins.
- Click "OK" to apply the changes.
What are the Default Margins in Google Docs?
The default margins in Google Docs are set to 1 inch on all sides. This standard setting is suitable for most documents, but you may find that adjusting the margins can better serve your specific needs. For instance, if you are creating a presentation or a flyer, you might want to set narrower margins to maximize the space for images and text.
Can You Set Custom Margins in Google Docs?
Yes, Google Docs allows you to set custom margins. This feature is particularly useful when you have specific layout requirements or when you want to create a unique document style. As mentioned earlier, using the "Page setup" option, you can easily enter your preferred margin sizes to suit your needs.
How to Set Margins for Specific Sections of Your Document?
If you need to have different margins for different sections of your document, such as for a title page and the main content, you’ll need to use a workaround since Google Docs does not allow section-specific margins directly. Here’s a method to achieve that:
- Create a new document for the title page and set the desired margins.
- Once done, copy the title page content and paste it into your main document.
- Adjust the margins of the main document as needed.
What to Do if Your Margins Are Not Applying Correctly?
If you find that the margins are not applying as you expected, consider the following tips:
- Check if you have selected the correct document. Sometimes, users may have multiple documents open.
- Ensure that you click "OK" after making your changes in the "Page setup" window.
- Refresh the document or try closing and reopening it to see if the changes take effect.
How to Preview Your Document with New Margins?
After changing the margins, it’s essential to preview how your document looks. Here’s how you can do it:
- Click on "File" in the top menu again.
- Select "Print" or press Ctrl + P (Cmd + P on Mac).
- A print preview window will open, showing how your document will look with the new margins.
- If everything looks good, you can exit the print preview.
Conclusion: Perfecting Your Document in Google Docs
Knowing how to change the margins on Google Docs is a valuable skill that can enhance your document's presentation and readability. Whether you’re adhering to specific guidelines or simply aiming for a visually appealing format, adjusting margins can make a significant difference. By following the steps and tips outlined in this article, you can create documents that are not only functional but also aesthetically pleasing.
So go ahead, explore the margin settings in Google Docs, and take your document formatting to the next level!